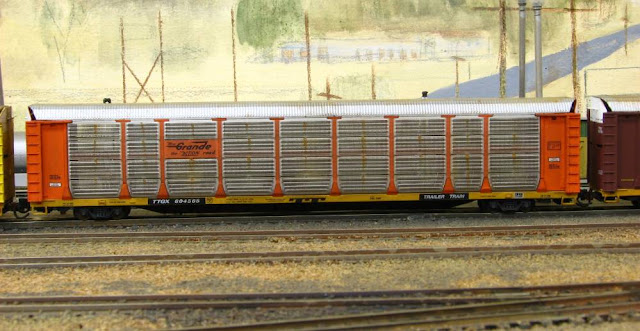
A few months ago, I posted a "how to" on weathering Micro Trains Auto Racks, and promised a follow up on weathering Red Caboose Auto Racks. There is a big difference in construction and assembly of the two models, and the following should help you to "age" those auto racks properly. The Red Caboose Auto Rack does not want to be disassembled! Please refer to that blog (July 9, 2012) for review of materials needed and weathering tips.
 |
| At this point, your auto rack should look something like this. |
 |
Now is the time to weather the roof. This should be done with attention to the riveting on the roof. I like to dab a little mixture of rust and dark sienna oils with a toothpick to the center of the rivet line and sweep back and forth along that line with a clean, dry paint brush, one used only for weathering. A very tiny dab should be used on the downside of the roof if necessary. Let dry completely. The above shows results so far.
|
 |
| Close up of completed weatering of roof. Don't forget to seal with dull coat and set aside. |
 |
| Next we want to mask off the panels. Many of these auto racks in the late 70's and early 80's were heavily weathered per the above photo. Mask off as suggested by the photo, again using Tamiya tape. |
 |
| When finished, your model should look something like this. PHOTO GALLERY |
This is not an easy project, but a very satisfying one. The difference between an "out of the box" auto rack and the finished product as illustrated in this blog is enormous! Good luck on your project.
I have a previously posted an N Scale video of a 1981 Auto Rack train on YouTube (the Red Caboose auto racks are primarily in the middle of the train) at:
http://youtu.be/XxzUouLStgo


Mike, those are Red Caboose cars. Not to be confused with Caboose Hobbies in Denver.
ReplyDelete