Monday, July 16, 2012

Addendum to Weathering MT Auto Racks

Con Cor Auto Racks and Vert A Pac car in Video on YouTube


IC "Vert A Pac" Car

I saw an advertisement involving this freight car in the early 70's showing how the sides pull down into ramps, then Chevy Vegas were driven up the ramp, ramps were closed, leaving the Vegas nose first.  Accommodations were made at the factory for various fluids in the cars.  I don't know if these cars were still in service in 1981.


Santa Fe Auto Rack  Red Paint Scheme

All of the Con Cor cars have "N Scale of Nevada" photo etch panels.  These panels are no longer available.  (If someone has some extras, I need 6 more.)  This improved the appearance of the Con Cor auto racks remarkably.  I also modified the extensions on the Micro Train couplers, thus shortening the distance between cars.

Close up of Santa Fe Logo

The "t" in Santa Fe was applied in house by spraying Santa Fe red on a piece of sheet metal, then spraying on the "t", and welding it to the car.

Southern Pacific

SP auto racks were notoriously filthy.

Soo Line

Santa Fe in Mineral Brown

Denver and Rio Grande Western

Grand Trunk

Rooftops

Really weird precise weathering patterns.  I believe they follow the riveted sections.

SP rooftop

Canadian National

Chicago and Northwestern

I will deal with the Red Caboose Auto Racks in a future posting.

Prototype Photos:


I have posted a N Scale video of a 1981 Auto Rack train on YouTube at:

http://youtu.be/XxzUouLStgo

Weathering Micro Trains Auto Racks Pt. 2


Weathered Photoetch


The lower photoetch shows where the Tamiya masking tape was applied. Remove the masking tape and weather the remaining panels with streaks of rust from top to bottom. Streaking may continue to a lower panel.


Weathering the Roof
The above photo shows the weathering of the roof from left to right, with the initial streaks to the finished product.  Start with streaks of oils where rivets holding rooftop panels would be, and then dry brush across the rooftop.  The end result is on the right.   When that is done and fully dried, on to assembly.


Pieces for Final Assembly

Carefully position photoetch to side of model and put end caps in place.  Slowly add pillars to model one by one, working from ends to the middle, while making sure the end caps are in place.  The photoetch will try to slide out of position at first, and you must take care doing this.  After one side is in repeat on otherside, again, making sure the photoetch does not slip out of the end caps. 

Finally, pop the roof in place and attatch the weathered  (I am sure you have done this) trucks.  MT has a number of different wheelsets to chose from, including brown (rust) wheelsets. 

At this point it is time to spray Dull Cote over the entire model.

When finished, your model should look something like this.........

Assembled Weathered Chessie System MT Auto Rack

 Weathered Burlington Northern MT Auto Rack

 Weathered Santa Fe MT Auto Rack

 Weathered Rock Island MT Auto Rack

Thanks for looking up this blog.  I hope you found the last two blogs on weathering these models interesting.  Soon I will have a blog on weathering the Red Caboose Auto Racks, which require a different approach.  Next week, more N Scale action on the Needles Division!


 I have posted an N Scale video of a 1981 Auto Rack train on YouTube at:


Monday, July 9, 2012

Weathering Micro Trains Auto Racks Pt.1

Weathering Micro Trains Auto Racks Pt.1

Chessie System Auto Rack

Stock MT Auto Rack between two weathered MT Auto Racks. In this week's blog I will show you how to take apart the MT Auto Rack and weather individual pieces.  It is not a quick job, but very satisfying as different parts of the prototype weather differently.

Materials

Materials include a working space, lots of prototype photos (mostly shot by yours truly in Cajon Pass, CA), chalks, dull coat, oils, Tamiya masking tape, clay stands, more chalk and plenty of dry brushes

Intial Disasembly

Pop out the end caps and remove the roof.
Support Pillars
Very carefully (VERY CAREFULLY!) remove the support pillars from the plastic centerpiece. Gently press each pillar to some soft clay, basically so they won't break and you won't lose one.  When they are all removed, you will be able to move the photoetch portion of the model aside for  weathering. 

Disassembled Auto Rack

Removal of the support pillars allows the photoetch panels to slide off.

Oils and Chalks

Prior to applying chalks it is necessary to dull coat the entire model first.  I prefer Tamiya dull coat, but I believe the TS-80 dull coat has been discontinued. 
Weathering the Pillars
It is better to weather the pillars separate from the photoetch panels as they weather differently, mainly because on the prototype they are made from very different materials.  Spreading the chalk over the pillars allows you to vary the weathering on each pillar, but on most of the prototypes, the weathering seems to be reasonably consistent.

Dry Brushing with Chalks

Create streaks of rust, dirt, etc., by brushing straight down on the frame.I myself prefer this method rather than airbrushing the entire model.  It ends up looking much more realistic.

Creating Rust Streaks

You can create rust streaks by utilizing a toothpick or a pin to dab a spot of oil paint at a point on the model and brushing downward.  You can either brush down just after you dab on the oils or wait till the dabs dry, and use a little paint thinner on the brush and again brush downward.  If you haven't tried this method yet, experiment on some of your scrap boxcars.


Refer to Prototype Photos
Mask Off Accordingly

Use Oils to weather panels
You could also use any type of rust colored paints, but don't forget to vary the amount of rust on each panel, as it seems no two are the same.  Blend different rust colored oils together to create different shades of rust.  Do not spread the oils or paint on too thick, as you can clog up the the holes in the photoetch panels.  When the oils have dried, spray on dullcote.

Next week I will show you assembly and the results of a few weathered MT Auto Racks.

I have posted an N Scale video of a 1981 Auto Rack train on YouTube at:

http://youtu.be/XxzUouLStgo


Monday, July 2, 2012

Santa Fe Super Fleet FP45 Businesss Special


Business Special powered by Super Fleet FP45's

FP45's 93 and 92 leading Business Special

With Santa Fe concentrating on double stack trains, it was necessary to go out and promote this business with potential customers.  Today's train carries Santa Fe executives and sales people with three 4-4-2 Regal class sleepers, a Big Dome car, and Business Lounge.

Business Special with three sleeper cars from the Regal 4-4-2 series

Dome-Lounge Dormitory car and Business car

Dome Lounge Dormitory car from 550 Class

The small window section indicated the location of the crew lounge dormitory.  This is different from the original Big Dome cars as they were strictly lounge cars, and on those cars, all windows are the same size.
This car made froma Bachmann Big Dome car with M & R sides added for better detail and correct window placement.  Most of the Bachmann shell was removed and the sides carefully added to the window framing.


Business Car Topeka

Kato business car modified with 6 wheel Commonwealth trucks, wheel wells carved open and new taillight arrangement.

Santa Fe Super Fleet FP45's 92 and 93

As mentioned lasst week, these are highly modified Lima shells on a
C44-9W chassis.  New ladder steps and air conditioning unit part of improvements, along with the obvious repaint and use of Micro Scale decals.

BLMA fans

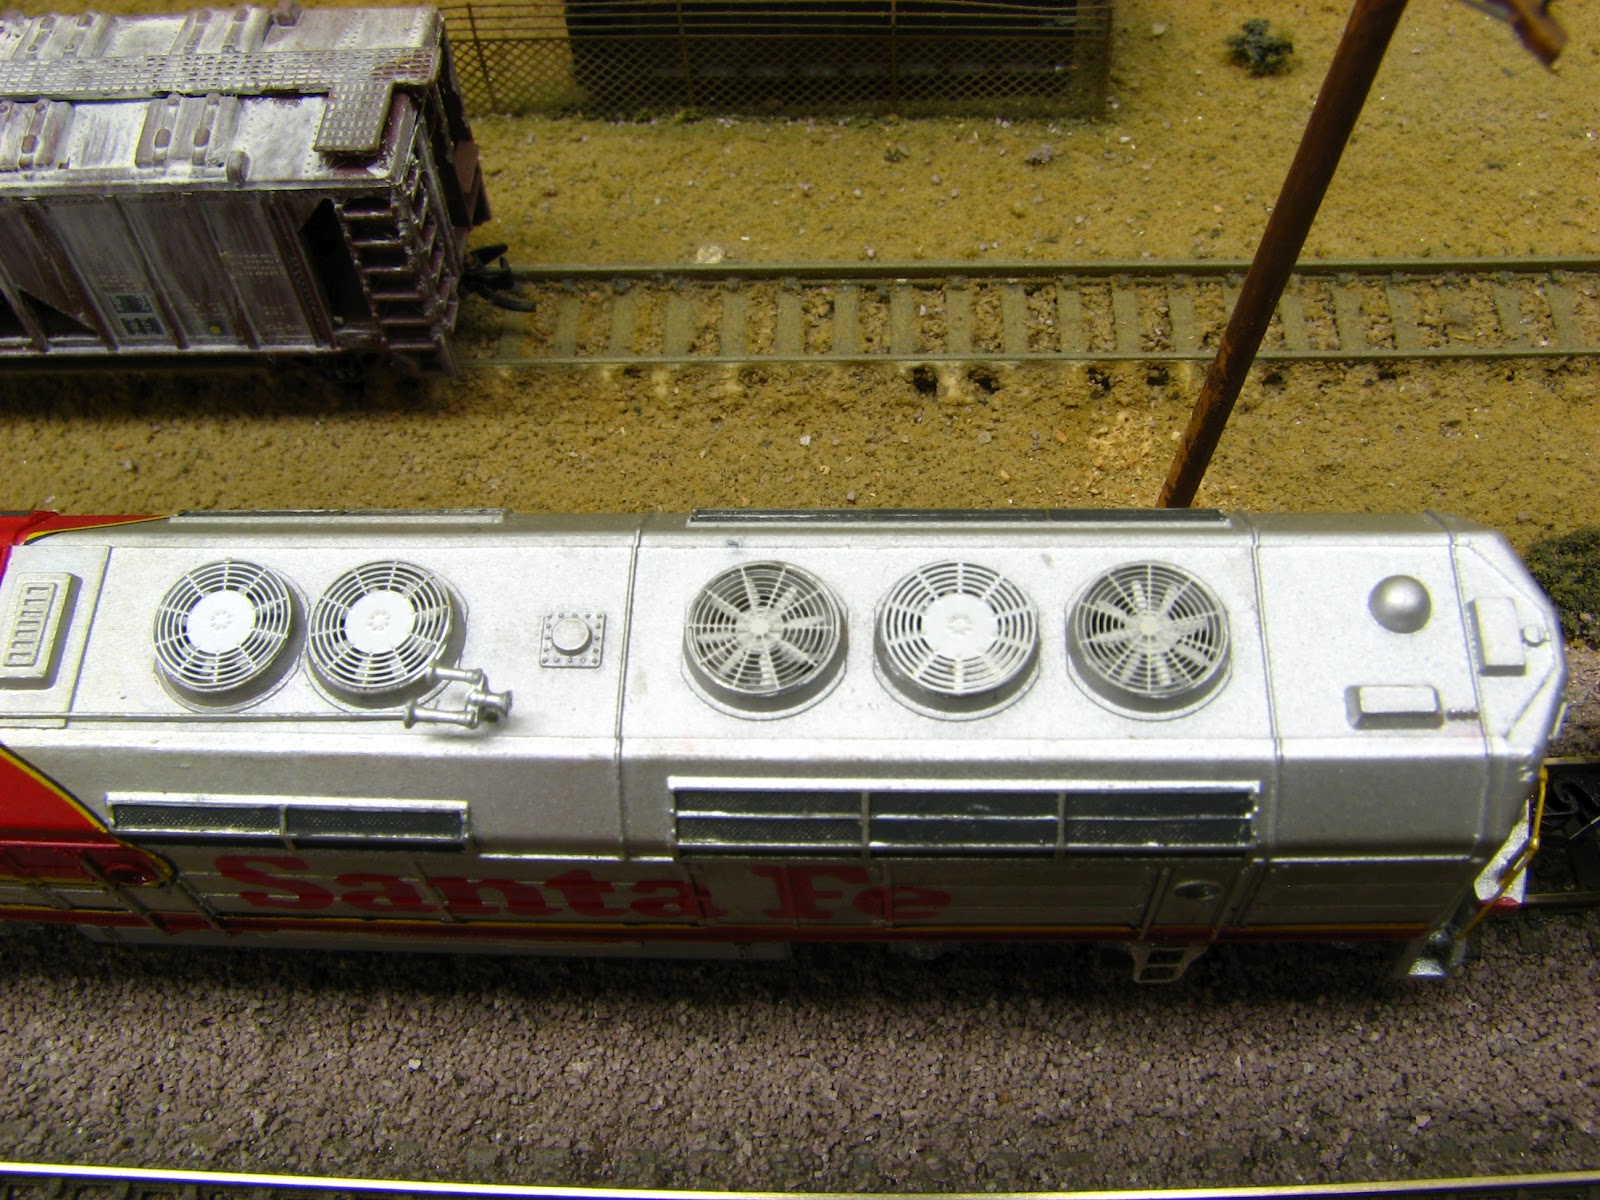
My FP45's have BLMA 48" fans installed, replacing the crude fans molded onto the model.  It is a relatively simple project producing fantantic looking results.  Something not really necessary to do with the Athearn models.


BLMA fans

Some of the fans have a center plate.  I am not sure as to why there are two different types as they both have eight blades.  They were also installed as needed and relaced with what was on hand.  I also repositioned the horns per the prototype.

You can see  a video of this Business Special on YouTube at:

                       http://youtu.be/nBhmUS-dkKY


Monday, June 25, 2012

FP45 Double Stacks "Red Warbonnet"

FP45 Double Stacks "Red Warbonnet"

Looking for a way to promote their Hi Speed Intermodal service, new president Michael Haverty decided a great way to do this was to bring back the red and silver “Warbonnet” paint scheme.   In the meantime, he ordered the repainting of the FP45’s into the warbonnet paint scheme and had them tour the country promoting their intermodal freight service.  In 1989 the Santa Fe was to order 123 new locomotives from GE and EMD, and he decided they would be delivered in such a paint scheme.


FP45's in the Red Warbonnet paint scheme


About the models.  These FP45's have been highly upgraded from the original Lima locomotives I scrounged around for in the early 1980's at swap meets.  Although the shells are rough by today's standards, I managed to modify the shells with creating pilots, adding details, such as BLMA fans, to produce pretty respectable models.  The shells were installed on C44-9W frames with SD45 trucks obtained from Kato.
Sea Land Containers

All cars in this train are 40' well cars
<><><><><><><><><><><><><><>
As you can see, I haven't as yet weathered these cars or containers

45' Mitsui container on 40' American President's Line container


You can see a video of this double stack train at YouTube at:
http://www.youtube.com/watch?v=X075X3PeDM0


Sunday, June 17, 2012

SD75M Double Stacks 1995

SD75M DOUBLE STACK 1995

Newly acquired SD75M's eastbound through Barstow, CA
In 1995 Santa Fe took delivery from EMD 51 SD75M's with either 4300 or 4500 h.p., based on respective rpm expected from the prime mover.  These were the last units purchased by Santa Fe from EMD before the merger into the BNSF.  The train is seen passing in front of the Barstow station.
Weathered Evergreen and APL 40' containers

Mounting posts and end posts on Santa Fe containers painted silver as on the prototype

Weathered well cars

Lightly weathered containers

Looks like new Santa Fe 48' well cars


You can view a three minute video of the double stack at:  http://www.youtube.com/watch?v=VQp-ypkt_RU

Tuesday, June 12, 2012

Dash 8-40BW 1990-1992

DASH 8-40BW 1990-1992
Trio of Dash 8-40BW's serviced at Barstow.   

Note American Limited Fuel stations


This will be my second posting on the Needles Division of the Santa Fe Railroad in N Scale, which I will from now on just call it the Needles Division.  Thought I'd trot out my Dash 8-40BW's for a double stack dash through the division.  At the bottom of the blog, you will find a link to YouTube and a short video on this trip.  I have decided to post all videos on You Tube because the quality is much better than I can upload here. 

I mentioned in my last blog that I have a number of "trains" on my layout covering many time periods.  I really did not know how much stuff I had from eras outside of my main interest.  For instance, I purchased all the containers and well cars at an outrageously low price at a garage sale.  I also saw all of the Super Fleet locomotives in Cajon Pass in the early 90's, and had to have models of them.  So soon I had nearly all of them.  (Waiting on Fox Valley Models for their GP60M's).  So future posts likely to be spread all over the last half of the 20th Century for a while.  So here goes No .2.
K Lines of a different color

More K Line

Colorful containers are muck easier to weather than white

Note that the mounting posts and end posts are painted silver; as purchased they are painted like the rest of the container, white. 

More K Lines of a different color

K Line red weathers in reality very fast

48' on 40' and 40' on 48'

You can see a 3 minute video of this train in action on YouTube at the following web site: